cd /tmp
wget http://yourrhqserver:7080/downloads/connectors/rhq-rtfilter-module.zip
cd <JBOSS_HOME>/modules
unzip /tmp/rhq-rtfilter-module.zip
Overview
The jboss-as-7 plugin handles discovering and managing JBoss AS 7.x and JBoss EAP/SOA-P/etc. 6.x.
JBoss AS 7.x Servers can always be auto-discovered, but in order to collect metrics and execute operations, the plugin must be able to connect to the server http(s) management interface.
Configuring the connection
Endpoint
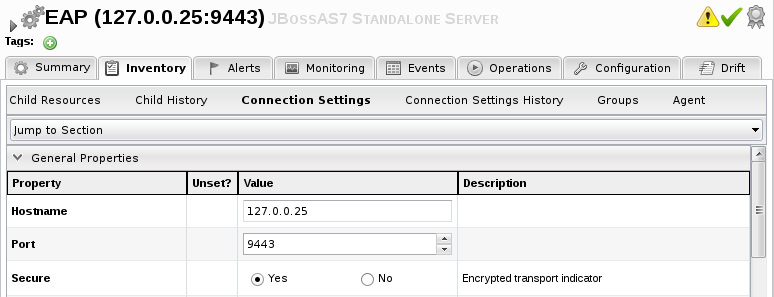
Hostname, Port, and Secure connection properties are determined during the discovery phase. The plugin will find the values by inspecting the AS7 configuration file.
Authentication
The most common way to authenticate is to provide the credentials of an AS7 management user. For a standard server, adding a management user can be achieved by running ./add-user.sh in the server's bin-folder. This will add the user to both standalone and domain configuration files. See: https://docs.jboss.org/author/display/AS72/add-user+utility.
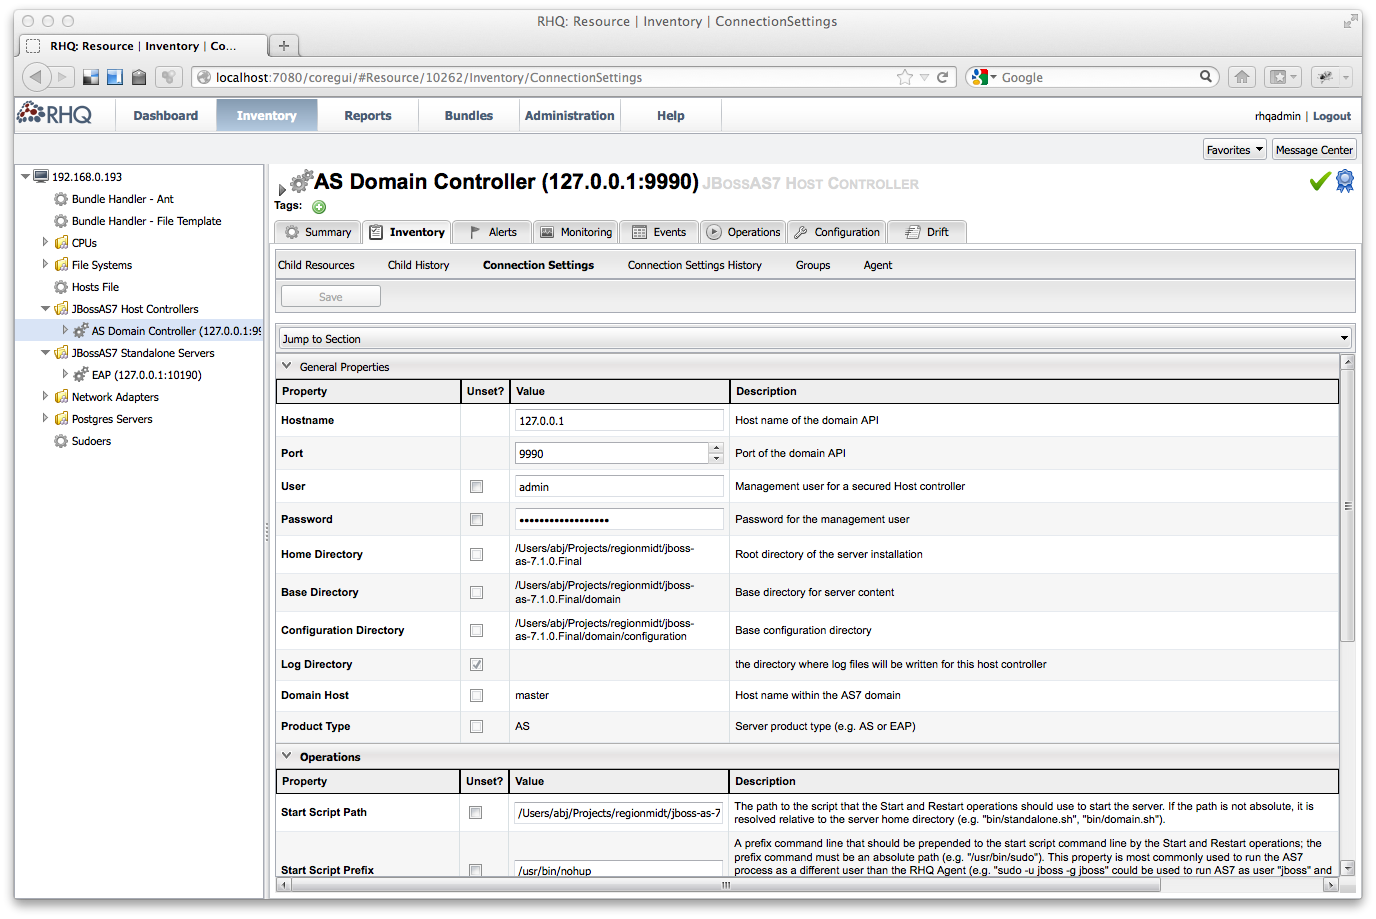
Once the user has been added, select the domain controller or standalone server in the RHQ GUI, then select the inventory tab and click "Connection Settings". Enter the username and password for the management user and click "Save".
It is also possible to authenticate with client certificates over an https connection. See the Secure Connection Settings appendix.
Enabling HTTP Response-Time Metrics
Before enabling HTTP Response-Time metric collection in your JBoss AS Server "Web Runtime" Resources, you will need to configure the RHQ RT filter module and either configure the RT filter globally (i.e. for all deployed webapps) by deploying the RT filter subsystem, or for specific webapps by updating their web.xml files.
For this to work you need to download two zip files from the RHQ Server and install them into AS7:
-
rhq-rtfilter-module.zip – Install the RT Filter Module
-
rhq-rtfilter-subsystem-module.zip – Configure RT Filter Globally
The next two paragraphs describe how to install them.
Install RT Filter Module
The filter jar is packaged as AS7 module. To configure the module in your AS7 instance, first install the jar and the associated module.xml file:
Then globally deploy the module by adding the following element as a child of the <subsystem xmlns="urn:jboss:domain:ee:1.0"> element in standalone.xml or domain.xml:
<global-modules>
    <module name="org.rhq.helpers.rhq-rtfilter" slot="main"/>
</global-modules>
This should now look like this:
<subsystem xmlns="urn:jboss:domain:ee:1.0">
  <global-modules>
    <module name="org.rhq.helpers.rhq-rtfilter" slot="main"/>
  </global-modules>
</subsystem>
In case of a later server version, this may also be urn:jboss:domain:ee:1.1 as in
<subsystem xmlns="urn:jboss:domain:ee:1.1">
   <spec-descriptor-property-replacement>false</spec-descriptor-property-replacement>
   <jboss-descriptor-property-replacement>true</jboss-descriptor-property-replacement>

   <global-modules>
      <module name="org.rhq.helpers.rhq-rtfilter" slot="main"/>
    </global-modules>
</subsystem>
Also you may need to add an extension tag as in
<extension module="org.rhq.helpers.rhq-rtfilter-subsystem"/>
Configure RT Filter Globally
You can deploy the filter for all webapps or individually for selected ones - this is shown below.
To configure the filter for all deployed webapps, first install the RT filter subsystem jar and the associated module.xml file:
cd /tmp
wget http://yourrhqserver:7080/downloads/connectors/rhq-rtfilter-subsystem-module.zip
cd <JBOSS_HOME>/modules
unzip /tmp/rhq-rtfilter-subsystem-module.zip
Then deploy the subsystem by adding the following element as a child of the <extensions> element in standalone.xml or domain.xml:
<extension module="org.rhq.helpers.rhq-rtfilter-subsystem"/>
and adding the following element as a child of the <profile> element in standalone.xml or domain.xml:
<subsystem xmlns="urn:rhq:rtfilter:1.0">
    <!-- Optional parameters. Note these typically remain commented. Also,
         some of these values may be configurable on the relevant "Web Runtime"
         resource, via the RHQ GUI.

       <init-param>
           <param-name>chopQueryString</param-name>
           <param-value>true</param-value>
       </init-param>
       <init-param>
           <param-name>logDirectory</param-name>
          <param-value>/tmp</param-value>
       </init-param>
       <init-param>
           <param-name>logFilePrefix</param-name>
           <param-value>localhost_7080_</param-value>
       </init-param>
       <init-param>
           <param-name>dontLogRegEx</param-name>
           <param-value></param-value>
       </init-param>
       <init-param>
          <param-name>matchOnUriOnly</param-name>
          <param-value>true</param-value>
       </init-param>
       <init-param>
           <param-name>timeBetweenFlushesInSec</param-name>
           <param-value>73</param-value>
       </init-param>
       <init-param>
           <param-name>flushAfterLines</param-name>
           <param-value>13</param-value>
       </init-param>
       <init-param>
           <param-name>maxLogFileSize</param-name>
           <param-value>5242880</param-value>
       </init-param>
-->
</subsystem>
Configure RT Filter on a Per Webapp Basis
You can either configurre the filter globally as previously seen or per app. For each webapp for which you wish to configure the filter, add the following lines to the webapp's WEB-INF/web.xml then redeploy the webapp:
<!-- ===== RHQ Response Time Metric Filter ===== -->
  <!-- This filter gathers response time information for processed requests -->
  <!-- for all hosted applications. This requires that the                  -->
  <!-- rhq-rtfilter-X.X.X.jar also be placed properly in the Tomcat         -->
  <!-- deployment. The jar file can be downloaded from the RHQ Server.      -->
  <!-- Using the GUI, navigate to the Administration page. Then click       -->
  <!-- 'Download Agent Connectors'.                                         -->
  <!-- Download connector-rtfilter.zip. Unzip to extract the jar.           -->
  <!--                                                                      -->
  <!-- Optional parameters                                                  -->
  <!--                                                                      -->
  <!--   chopQueryString  Filter directly chops off the query parameters    -->
  <!--                    from the URL? Default is true.                    -->
  <!--                                                                      -->
  <!--   logDirectory     Directory to which the logs are written.          -->
  <!--                                                                      -->
  <!--   logFilePrefix    Prefix to written logfile names.                  -->
  <!--                                                                      -->
  <!--   dontLogRegEx     Patterns that should not be logged.               -->
  <!--                                                                      -->
  <!--   matchOnUriOnly   Apply the dontLog pattern to the URI only?        -->
  <!--                                                                      -->
  <!--   timeBetweenFlushesInSec                                            -->
  <!--                    Seconds between auto flushes of the logfile.      -->
  <!--   maxLogFileSize   The maximum allowed size, in bytes, of the        -->
  <!--                    logfiles if a logfile exceeds this limit, the     -->
  <!--                    filter will truncate it; the default value is     -->
  <!--                    5242880 (5 MB)                                    -->
  <!--   vHostMappingFile Name of vhost mapping file. This properties file  -->
  <!--                    must be in the Tomcat process classpath.          -->
  <!--                                                                      -->

   <filter>
       <filter-name>RhqRtFilter</filter-name>
       <filter-class>org.rhq.helpers.rtfilter.filter.RtFilter</filter-class>

<!-- Optional parameters. Note these typically remain commented. Also,
     some of these values may be configurable on the relevant "Web Runtime"
     resource, via the RHQ GUI.

       <init-param>
           <param-name>chopQueryString</param-name>
           <param-value>true</param-value>
       </init-param>
       <init-param>
           <param-name>logDirectory</param-name>
          <param-value>/tmp</param-value>
       </init-param>
       <init-param>
           <param-name>logFilePrefix</param-name>
           <param-value>localhost_7080_</param-value>
       </init-param>
       <init-param>
           <param-name>dontLogRegEx</param-name>
           <param-value></param-value>
       </init-param>
       <init-param>
          <param-name>matchOnUriOnly</param-name>
          <param-value>true</param-value>
       </init-param>
       <init-param>
           <param-name>timeBetweenFlushesInSec</param-name>
           <param-value>73</param-value>
       </init-param>
       <init-param>
           <param-name>flushAfterLines</param-name>
           <param-value>13</param-value>
       </init-param>
       <init-param>
           <param-name>maxLogFileSize</param-name>
           <param-value>5242880</param-value>
       </init-param>
-->

   </filter>

  <!-- ===== RHQ Response Time Metric Filter Mapping ===== -->
  <!-- To limit to only certain applications various filters can be         -->
  <!-- defined. This will perform RT metric collection for all              -->
  <!-- applications.                                                        -->
   <filter-mapping>
       <filter-name>RhqRtFilter</filter-name>
       <url-pattern>/*</url-pattern>
   </filter-mapping>
Restart JBoss AS
After installing the filter module and/or filter subsystem, JBoss AS must be restarted to pick up the changes.
Appendices
Secure Connection Settings
The Connection Settings tab has a Secure Connection Settings section:
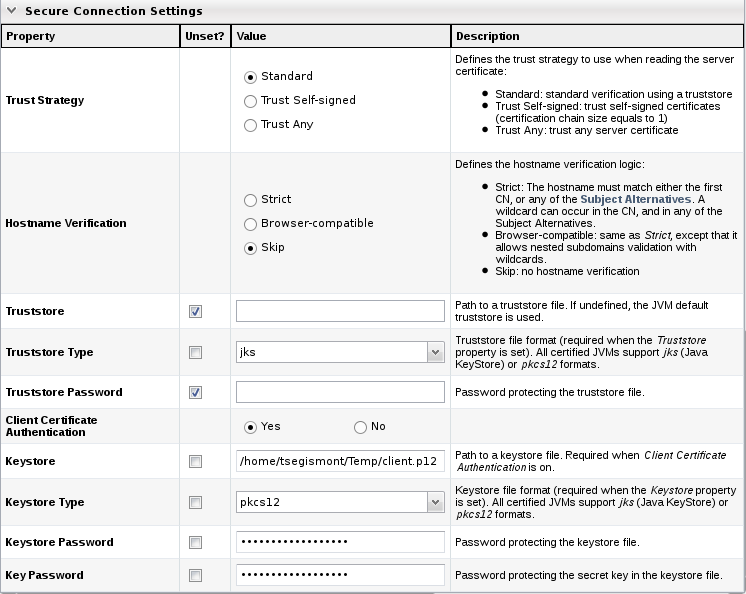
You will have to customize these settings manually in order to connect over https, with or without client certificate authentication.
Configuring the managed AS7 server
https endpoint
There are three ways to configure the https management endpoint
Standalone servers favored style (socket-binding style)
The socket-binding node attribute is either https or http:
    <management>
        <management-interfaces>
            <http-interface security-realm="ManagementRealm">
                <socket-binding https="management-https"/>
            </http-interface>
        </management-interfaces>
    </management>
Host controllers style, unfavored standalone servers style (socket style)
    <management>
        <management-interfaces>
            <http-interface security-realm="ManagementRealm">
                <socket interface="management" port="9990" secure-port="9443"/>
            </http-interface>
        </management-interfaces>
    </management>
Very old and deprecated style (early AS7 releases style)
    <management>
        <management-interfaces>
            <http-interface security-realm="ManagementRealm" interface="management" port="9990" secure-port="9443"/>
        </management-interfaces>
    </management>
ManagementRealm
The ManagementRealm must declare:
-
a keystore for transport encryption
-
a truststore, optionally, for client certificate authentication
    <security-realm name="ManagementRealm">
        <server-identities>
            <ssl>
                <!-- Keystore definition: the file contains the server private key and the server certificate -->
                <keystore path="server.jks" relative-to="jboss.server.config.dir" keystore-password="rhqadmin"/>
            </ssl>
        </server-identities>
        <authentication>
            <!-- Optional truststore definition: the file contains the client certificate -->
            <truststore path="server.jks" relative-to="jboss.server.config.dir" keystore-password="rhqadmin"/>
                <local default-user="$local" allowed-users="*"/>
        </authentication>
    </security-realm>
Self-signed server and client certificates how-to
Paste the commands below in a console in order to create a server and a client keystores with selfsigned certificates.
# Generate server key pair
keytool -genkeypair -alias server -keyalg RSA -keystore server.jks -dname cn=server,ou=rhq,o=redhat -storepass rhqadmin

# Generate client key pair
keytool -genkeypair -alias client -keyalg RSA -keystore client.jks -dname cn=client,ou=rhq,o=redhat -storepass rhqadmin

# Put server certificate in the client keystore
keytool -exportcert -file server.cert -keystore server.jks -storepass rhqadmin -alias server
keytool -importcert -file server.cert -keystore client.jks -storepass rhqadmin -alias server

# Put client certificate in the server keystore
keytool -exportcert -file client.cert -keystore client.jks -storepass rhqadmin -alias client
keytool -importcert -file client.cert -keystore server.jks -storepass rhqadmin -alias client
You can now use these keystores to setup the managed AS7 server and the corresponding RHQ server resource.
Optionally, you can create a PKCS12 variant of your keystores:
# Create a PKCS12 client keystore from the JKS keystore
keytool -importkeystore -srckeystore client.jks -destkeystore client.p12 -srcstoretype jks -deststoretype pkcs12 -srcstorepass rhqadmin -deststorepass rhqadmin -srcalias client -destalias client
# Create a PKCS12 server keystore from the JKS keystore
keytool -importkeystore -srckeystore server.jks -destkeystore server.p12 -srcstoretype jks -deststoretype pkcs12 -srcstorepass rhqadmin -deststorepass rhqadmin -srcalias server -destalias server

# Check the sanity of the resulting files
openssl pkcs12 -info -in server.p12
openssl pkcs12 -info -in client.p12